Once in a while you may find yourself in need of getting a portrait photo print. Other than passport photo which requires photographer's seal, some occasions allows 100% DIY. For those cases, you can get everything done in 10mins, and submit to any printing services.
This blog will show you all the details, one need to know to get this job done with ease.
This blog will show you all the details, one need to know to get this job done with ease.
STEP-0: Required tools:
- A digital camera, or just your cellphone with a reasonably good camera.
- For MAC, I recommend to use Photoshop, and this tutorial is done on Mac with Photoshop CC 2015
- For PC, I recommend to go for Paint.net (freeware) www.getpaint.net/download.html
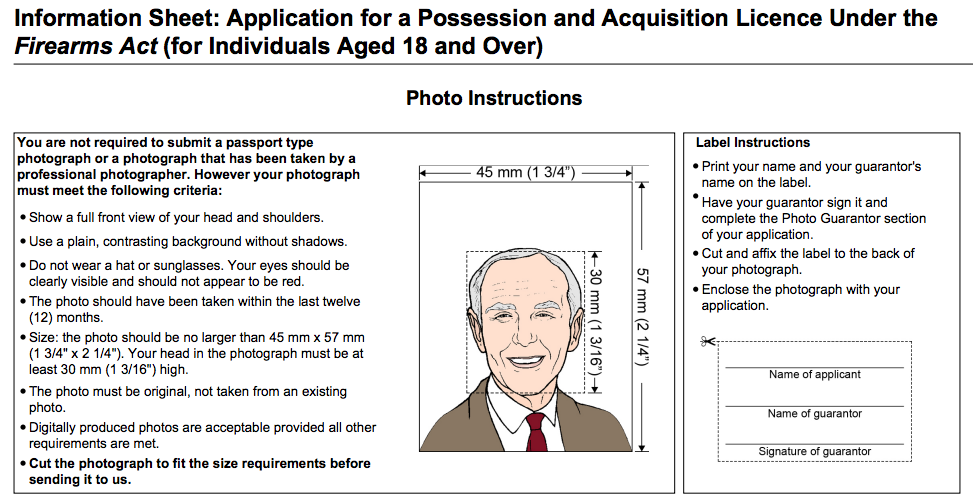
- Size: no larger than 45mm x 57mm
- Head to chin: at least 30mm
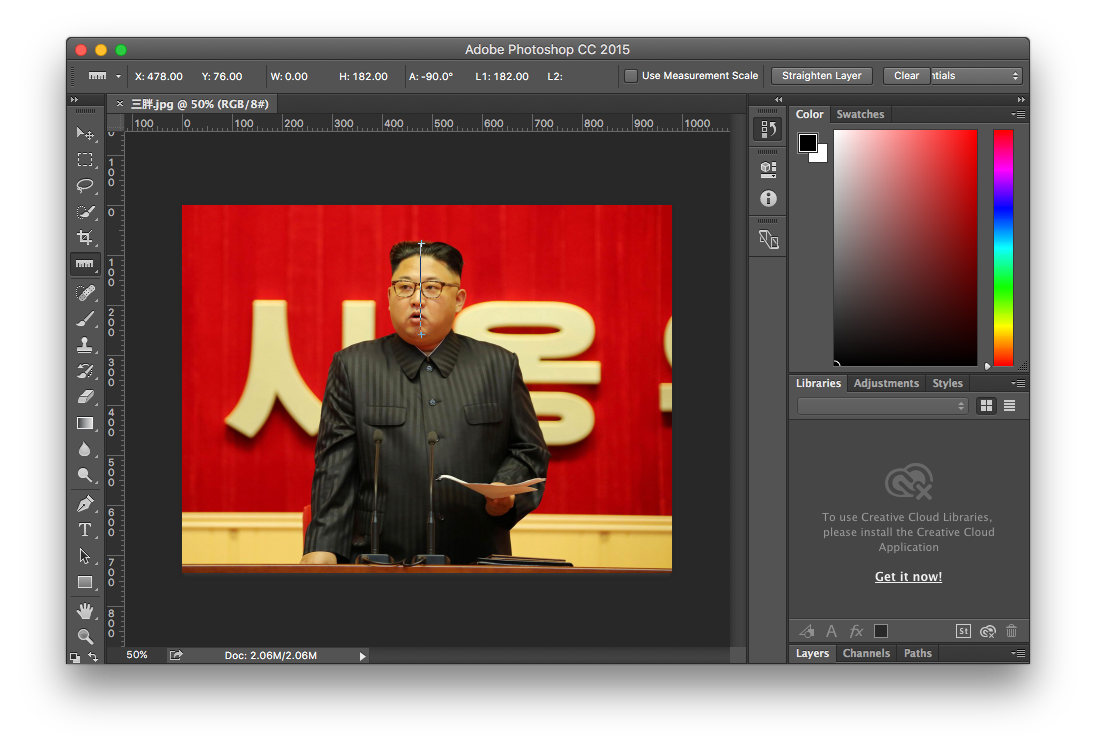
STEP-2: Open your photo with Photoshop, select ruler tool (I), and measure from the crown to chin, press and hold shift key to get a straight line measure.
Measurement result here is used to calculate pixel density for your final image.
For example here: we get crown to chin to have 182pixels (note: this handsome young man's picture is download from Internet for illustration purpose only, actual photo should have much higher pixel numbers in this measurement).
STEP-3: In order to select proper size based on requirement, one need to find out required size in pixel, not in mm. To find out the size of the box to select, use following calculation.
182pixels corresponds to 30mm in our requirement. For the portrait, we need 45mm x 57mm, it's in round(45mmx(182/30mm)) and round(57mm x (182/30mm)) = 273pixel x 346pixel.
182pixels corresponds to 30mm in our requirement. For the portrait, we need 45mm x 57mm, it's in round(45mmx(182/30mm)) and round(57mm x (182/30mm)) = 273pixel x 346pixel.
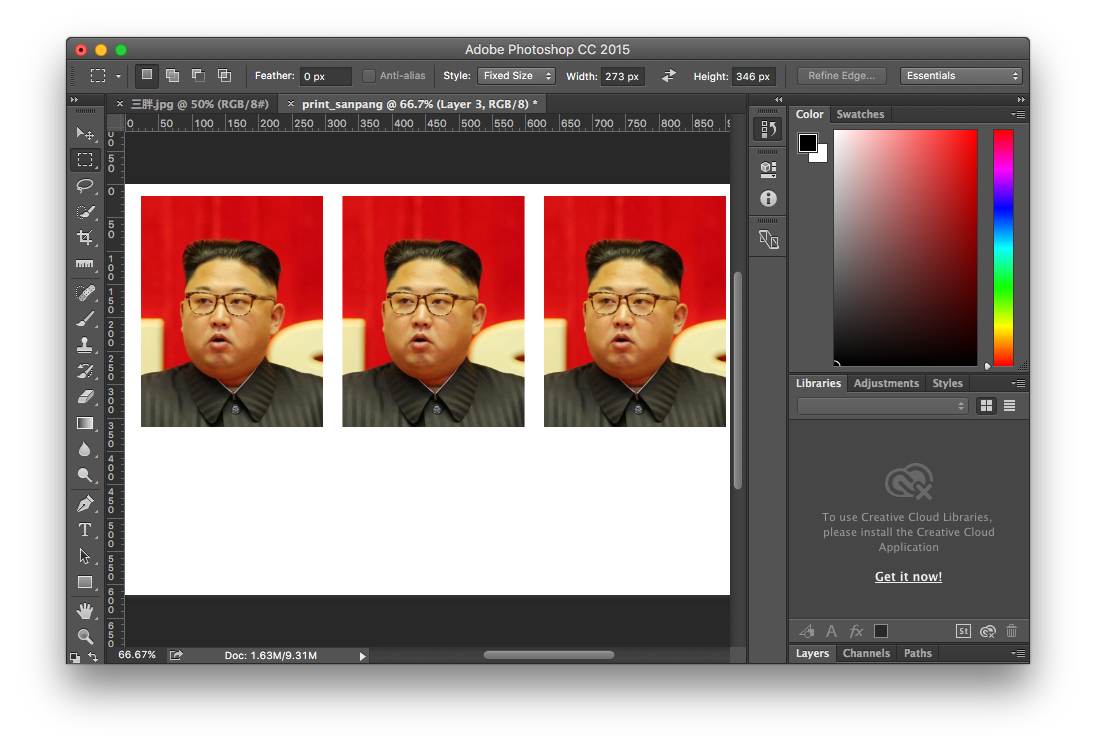
STEP-4: Use select (Rectangular Marquee Tool (M) ) with Fixed Size and set Width = 273px and Height = 346px.
This gives you a box of selection, position the box appropriately then you get the contents for your tiled image. Copy the selection.
This gives you a box of selection, position the box appropriately then you get the contents for your tiled image. Copy the selection.

STEP-5: Open a new file, with following settings:
Width = 6 inch
Height = 4 inch
Resolution = 60.6667 Pixel/Centmeter (= 182/30mm x 10)
Past your selection from STEP-4 into your new file, and manually place them, remember to leave some margin on all the edges to accommodate printing tolerance.
Save your file into TIFF, JPEG, or other supported image file format.
STEP-6: Recommend to go to COSTCO Photocenter: www.costcophotocentre.ca
Or bring your file to any instant printing services.
Viola!
Or bring your file to any instant printing services.
Viola!
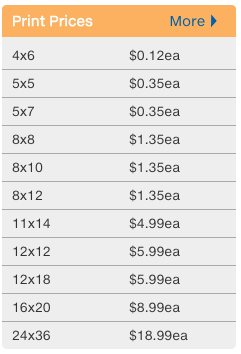 Costco Photo Printing Prices: |
 RSS Feed
